
This is my next project and I realize I have done an awful job of doing instructions in the past. I have prettied up the blog a little, and will start this one in a detailed and nice looking manner. It will be a post that will be updated, so hopefully I can keep it up.
First steps were to get customer measurements, gather lots of reference photos, and do a basic sketch. I decided to do two pieces; a bodice with attached sleeves and an elastic waist skirt with white slip underneath.
Second step was to order the custom printed fabric from Spoonflower here
There is a lighter colored print for the bodice and a darker one for the center panel of the skirt.


7-24-2013
Since I did not make it to the store to purchase matching materials yesterday, I made a stencil last night. Using some close up photos of the embroidery on the skirt, I did about a 2 foot by 4″ sketch. This embroidery goes up both sides of the front panel, as well as around the whole circumference of the skirt, so there is no way I am going to embroider all of that by hand! I could use an applique lace or spend a year trying to program my embroidery machine to do this, but I decided on painting it with my stencil. I like to use what I have handy often times, so I cut the thick clear plastic covering on a binder off to use as my template. I traced over my paper template onto the clear plastic and cut it out with an exacto knife. I did not need to cut the pieces out of the paper template, but did not realize this until I realized a paper template would not work with the paint.

BecauseISaidSew.blogspot.com has a good image of the embroidery sketch uploaded

7-26-2013
Made it to the store today and found matching the purple in the darker print for the skirt was super hard. Luckily, I had an old formal dress that I had forgotten about and it was the perfect shade. I also picked up my lilac for the sleeves, pink ribbon for the stripes and corset lacing, fabric paint and brushes. I had the whole evening to work (minus dinner and bedtime for kiddo)

First, I drafted a pattern using McCalls 4107. This is a pattern designed to end at the high waist, so I had to extend it down about 3-4″. I just slightly flared the bottoms..more is better because I ended up trimming to what was shown after fitting it on my mannequin. You can also see a few other changes I made. I cut the strap back edge and taped it to the front strap and added some more length ( add more next time!) I also curved the front edge at the top so it will look more like hers (at the red block). You will also see where I did not place the back piece on the fold, rather, I placed a cut there and even added more onto the back edge.

I had some fabric of the dark pink polka dot variety, so I did my first try with this. It only needed minor adjustments on my mannequin, so decided to use it as my liner rather than make a new liner. I left the back seam open for final adjustments unlike the pattern which had a one piece back panel. I made bone casings with my pink ribbon on the RIGHT side of the liner. Just because. I normally do them on the wrong side, but this was just too cute. I order my steel bones from corsetmakingsupplies.com and always have a good variety in stock, so found some to fit leaving at least 5/8″ at each end. You don’t want your bones extending into your seam allowances because then you can’t turn it! After sewing the seams, I had two pieces: front side back right, and front side back left.

I then cut the same pieces from my printed fabric using the adjusted pattern, sewed them together the same. Now, I had four separate pieces. With right sides together, one liner and one outer, 5/8″ SA, I sewed full neck seam down the front edge and around the bottom. Trimmed, clipped, and turned right side out! Repeat for left side. Shown below is the front edge. The piece is still totally open on the back edge, so I reached in with a long bone and placed it at the front edge to keep it from bunching. Just a running stitch on the other side of the bone made a channel to keep it in place.

Once both pieces were done, I pinned it on my mannequin with a few inches open in the front where the laces and panel will go. Here is the photo of how the back overlapped and the straps met. I adjusted and marked where the straps should be attached.

Before I took it off the mannequin to sew the straps, I also pinned the back seam as shown below.

Then I took it back off and sewed the back seam and straps as I had marked them. Finally it is in one piece! I then trimmed the neck/back seam with little white lace and the bottom edge with a dark pink/white layered lace.

That is it for the bodice for today. Tomorrow I add sleeves, grommets and center panel.
I also got a lot done on the skirt today. The liner from my formal was PERFECT. I did not have to alter it at all. I cut it 36″ long, the hem measured 52″ and the waist was around 38-40″, plenty large enough to gather into an elastic waistband. Hopefully you can see in the following photo that I drew lines on the skirt. I marked centers at top and bottom, then marked 5″ out on each side of the top center, then 9″ out from the center of the bottom hem. I cut the exact same shape out of the darker printed material. 10″ X 36′ X 18″ X 36″ plus a small seam allowance for turning under the edges. Then I just laid it on top of the skirt and turned under the edges along the sides and bottom and topstitched right to the skirt! You can see the left side sewed down and the right side laying next to the white line I had drawn. I also decided to stitch down the bottom edge instead of letting it flow free.

That is enough for today, but have another free afternoon tomorrow to work on the stencil, petticoat and more!
7-26-2012
Each portion of the stencil has to dry before I can move the skirt around and do another, so I started with doing one portion. It turned out pretty well for my first try at painting a stenciled pattern onto fabric. Words of advice, tape down the slippery stencil and place cardboard underneath to catch the bleed through. This is light pink, but shows up white in the photo. I will go back after it is done and touch up with lavender.

While that was drying, I made the petticoat and put a lace ruffle around the bottom. I made this about an inch longer than the skirt, so that it will be sure to peek out. I can’t finish the skirt until the paint is dry, so petticoat is on hold for now.
In between portions of the stencil, it is back to the bodice. I had a huge puffy sleeve pattern that I knew would be to big, so I trimmed it down to about 19″ X 11″ and cut my pieces of lavender satin out. I marked lines and attached my pink ribbon stripes. Unfortunately, in the second photo, you can see I put them on the shiny side of the satin, where I wanted to use the back/duller side! No problem, I just turned it over and put new ones over the old stitch lines. 🙂


I am still waiting to find the best sheer pink fabric for the bottom of the arm, so the sleeves are on hold, but I pinned one on, and the new pattern seems to look about right. The bottom part of the arm needs to be attached before sewing the seam, so until I find that, the sleeves are the last thing to do!
I made a simple topstitched rectangle to act as the modesty panel for the front of the bodice, having finished edges even with 1/2″ below/above edges. This one was about 6″ wide and 12.5″ long. Knowing my customer was close to/ my mannequin, this left lots to spare. I sewed it to one side leaving the other side free to lay flat underneath as the top was cinched.
Before attaching the panel, I had to put on the grommets, as the panel needs to be attached not on the front edge but on the other side of the grommets so it does not interfere with the lacing. In other words, it is “behind” the lacing (towards the side seam). I eyeball all eyelets/grommets, but it was appx 1.5″ – 2″ between them.

The stencil paint in light pink on the skirt did not come out as great as I had hoped, and to go back and do another layer would have been hard and messy. I had wanted to do certain points in lavender to tie in the sleeves, but I ended up doing just an artistic touch up in lavender to all the lightly painted areas and I like it more than just an occasional touch of lavender!

I was hoping to do a natural light shot today to show the actual colors of the costume, but it is rain, AGAIN!!!
In leiu of a true color shot, I will give you a field test. My first sample of the paint on the fabric after a rain storm. The fabric is drenched and dark, but the paint is not running. Good to know. Anita’s it is for future fabric painting. I did no ironing, nor steaming and it is holding up perfectly!

The bottom sheer part of the sleeve was last, and it was basically a square sized piece of sheer pink material edged in lace and sewn to the bottom of the sleeve pouf, gathering in the pouf as it went around. Finished. Beautiful!


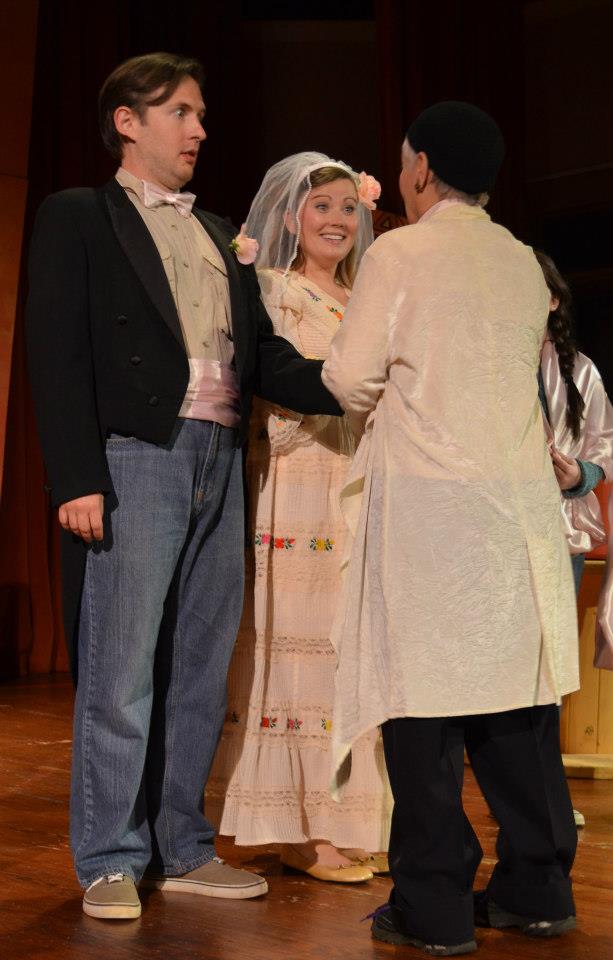
And another happy customer, above.
Oh…plus, I also got to make Flynn’s leather satchel! 🙂
(The close up on the bottom is PRE bone toggle)


This play was so much fun to design, especially with my own “outsoken” 8 year old to offer input.
With double casting for the kids, there we a lot of outfits to put together, but it came together great and the cast was amazingly nice, smart and hilarious. Just a couple of shots here:


roseofathens.org
Earlier in 2013, I was approached to see if I could recreate a picture in a magazine as a wedding dress.

I said I would try 🙂
Here is the best picture I got of it (shown without the sash) before it went off to the wedding.

I used two separate patterns. One was a princess line formal that I chopped at the waist. The skirt I changed from the very full one of the original pattern and actually used the pattern I use for my Princess Amidala skirt with the mermaid fishtail additions taken off. The bottom layer was ivory bridal satin, plus an ivory liner with a floral lace overlay. I used the scalloped edges of the lace to make the top “straps. They met in the back in a deep v and the raw edge at the arms was trimmed in a narrow strip of the other edge of the scalloping. She was planning to wear little red flats with it. I can’t wait to see some pics of the special day 🙂
And Finally, some wedding shots! She looks amazing 🙂


